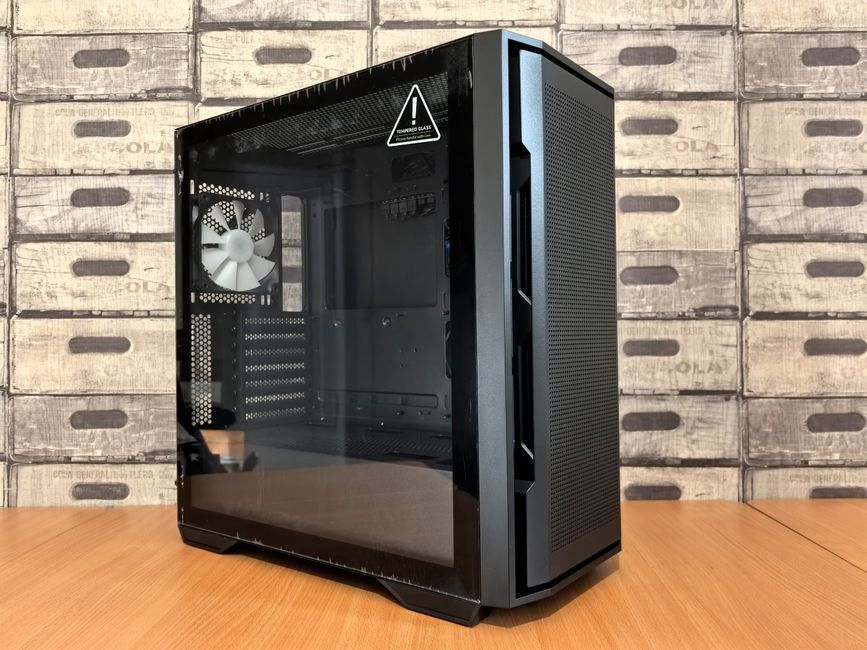
Overview
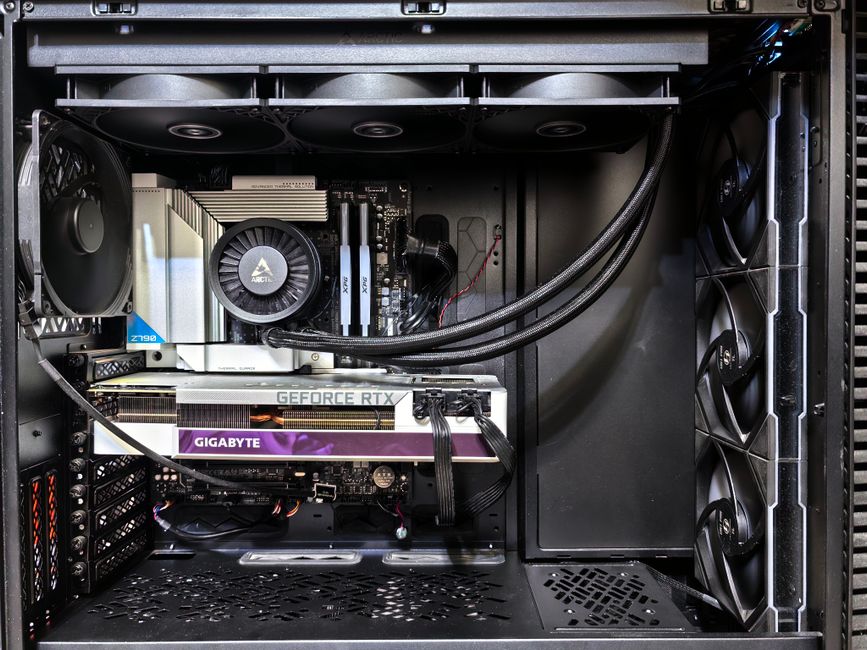
Building a budget gaming PC for 1080p resolution in 2026 remains one of the smartest entry points into PC gaming. With careful component selection, you can achieve smooth 60+ FPS gameplay in modern titles without breaking the bank. The sweet spot for budget builds sits between $600-$900, delivering exc nt performance for esports titles and AAA games at high settings.
The 1080p resolution continues to be the most popular choice among gamers, accounting for over 60% of Steam users. This widespread adoption means game developers optimize heavily for this resolution, ensuring you get the best bang for your buck. Budget-conscious builders can take advantage of previous-generation hardware that still crushes 1080p gaming while newer flagship components focus on 4K performance.
The current PC hardware market in 2026 offers unprecedented value for budget builders. Competition between AMD and Intel has driven CPU prices down, while GPU manufacturers have released strong mid-range options specifically targeting 1080p gamers. Memory and storage costs have stabilized, making SSDs and 16GB RAM configurations more accessible than ever.
Quick pick: Compare top-rated Pc options.
Choosing the Right Components
CPU Selection
Your processor choice sets the foundation for your entire build. For budget 1080p gaming, a 6-core or 8-core CPU provides the perfect balance of gaming performance and multitasking capability. AMD’s Ryzen 5 7600 and Intel’s Core i5-13400F both deliver exceptional frame rates while staying under $200.
CPU bottlenecking is less of a concern at 1080p when paired with mid-range graphics cards. Focus on current-generation processors with strong single-core performance, as most games still rely heavily on single-threaded performance. Previous-generation flagship CPUs like the Ryzen 7 5800X3D can sometimes be found at budget prices and offer incredible gaming value.
Don’t overlook the integrated graphics debate—save money by choosing CPUs without integrated graphics (F-suffix Intel chips) since you’ll be using a dedicated GPU anyway. This small decision can save $20-$40 that’s better invested elsewhere in your build.
GPU Considerations
The graphics card is your most critical component for 1080p gaming performance. Target GPUs in the $250-$350 range for optimal 1080p high-to-ultra settings gameplay. The AMD Radeon RX 7600 and NVIDIA RTX 4060 both excel at 1080p, offering ray tracing capabilities and modern feature sets.
VRAM capacity matters more in 2026 than ever before—aim for at least 8GB of video memory to handle texture-heavy modern games. Games like Hogwarts Legacy and The Last of Us Part I can exceed 6GB VRAM usage at 1080p high settings. The 12GB variants of budget cards provide exc nt future-proofing without significant price increases.
Consider previous-generation flagships like the RTX 3060 Ti or RX 6700 XT if you find them on sale. These cards often outperform newer budget options and can be found at competitive prices as retailers clear inventory. Check used markets carefully, avoiding cards that may have been heavily used for cryptocurrency mining.
Memory and Storage
**16GB of DDR4 RAM** remains the sweet spot for budget gaming builds in 2026. While DDR5 offers higher speeds, DDR4 provides better value for 1080p gaming where memory speed has diminishing returns. Choose a 2x8GB kit running at 3200MHz or faster for dual-channel performance benefits.
Storage strategy should prioritize a 500GB-1TB NVMe SSD for your operating system and primary games. PCIe 3.0 drives offer exc nt performance at $40-$60 for 500GB, with load times only marginally slower than PCIe 4.0 alternatives. Add a 1-2TB hard drive later if you need bulk storage for media and less-played games.
Avoid the temptation to cheap out on storage—a slow SATA SSD or hard drive as your primary drive will create noticeable stuttering in modern games with large asset streaming. The difference between a budget NVMe and premium model is negligible in gaming scenarios, so stick with reliable mid-tier options.
Motherboard Selection
Your motherboard should match your CPU socket while providing essential features without unnecessary premium costs. B660 boards for Intel and B650 boards for AMD offer the best feature-to-price ratio. Look for boards with four RAM slots, M.2 slots for NVMe drives, and sufficient fan headers for your cooling needs.
MATX (Micro-ATX) motherboards typically cost $20-$40 less than full ATX versions while offering identical performance for most users. Unless you need extensive PCIe expansion or multiple GPU support, MATX boards provide exc nt value. Ensure your chosen case supports the motherboard form factor you select.
Prioritize boards from reputable manufacturers with good VRM designs for stable power delivery. Poor VRMs can throttle your CPU under load or limit future upgrade paths. Reviews and VRM tier lists help identify boards that won’t compromise performance despite budget pricing.
Power Supply and Cooling
A quality 550W-650W 80+ Bronze power supply provides ample headroom for budget gaming builds. Never cheap out on the PSU—a failing power supply can damage every component in your system. Stick with reputable brands like Corsair, EVGA, Seasonic, or Thermaltake with at least 5-year warranties.
Calculate your system’s power draw using online PSU calculators and add 20-30% headroom. A typical budget 1080p build draws 350-450W under full gaming load, making a 550W unit perfectly adequate. Modular cables simplify building and improve airflow, though non-modular units work fine with careful cable management.
Stock CPU coolers included with many AMD processors work adequately for non-overclocked builds. Intel’s stock coolers have improved but consider a $25-$35 tower cooler like the Deepcool AK400 for quieter operation and better thermal headroom. Most budget GPUs use efficient dual-fan designs that maintain safe temperatures in cases with decent airflow.
Building the PC
Assembly Process
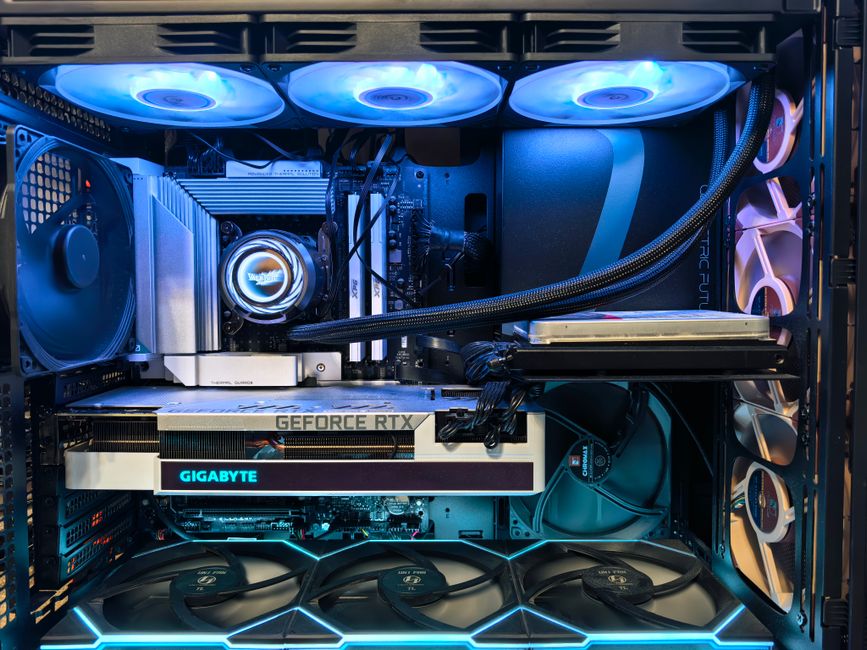
Start by installing the CPU, RAM, and M.2 SSD onto the motherboard before mounting it in the case. This approach provides easier access and reduces the risk of dropping screws into an installed motherboard. Apply thermal paste using the pea-sized method in the center of the CPU—the cooler’s mounting pressure will spread it evenly.
Mount the motherboard using all available standoffs to prevent flexing and potential short circuits. Connect the 24-pin motherboard power and 8-pin CPU power cables before installing the GPU, as these connections can be difficult to reach afterward. Double-check that RAM modules click firmly into place in the correct dual-channel slots (typically slots 2 and 4).
Install your graphics card last, ensuring it’s fully seated in the PCIe x16 slot closest to the CPU. Secure it with the case’s PCIe bracket screws and connect the required PCIe power cables from your PSU. Many budget GPUs require a single 8-pin connector, though some higher-end options may need dual 8-pin connections.
Cable Management
Efficient cable management improves both aesthetics and airflow through your case. Route cables behind the motherboard tray whenever possible, using the case’s built-in cable routing holes and velcro straps. Group cables by destination and secure them at multiple points to prevent sagging into fan paths.
Front panel connectors follow standard layouts, but consult your motherboard manual for the exact pin configuration. Power button, reset button, and LED headers are easy to reverse if you get them wrong initially. USB 3.0 front panel headers only fit one way, preventing incorrect installation.
Leave some slack in your cables to allow for future maintenance and upgrades. Tight cable management looks clean but can make component swaps frustrating. Hide excess cable length behind the motherboard tray or in the PSU shroud area that many modern cases provide.
Operating System and Drivers
Create a Windows 11 installation USB drive using Microsoft’s Media Creation Tool on another computer. Boot from the USB drive by accessing your motherboard’s boot menu (usually F11, F12, or Delete during startup). Windows 11 installs quickly on NVMe drives, typically completing in 15-20 minutes.
After Windows installation, download the latest chipset drivers directly from AMD or Intel, followed by GPU drivers from NVIDIA or AMD. Use GeForce Experience or AMD Adrenalin software for automatic driver updates and game optimization. Install the latest BIOS version if your motherboard manufacturer has released stability or compatibility updates.
Enable XMP (Intel) or EXPO (AMD) profiles in BIOS to ensure your RAM runs at its rated speed rather than default JEDEC speeds. This simple step provides a 5-15% performance boost in many games. Verify your RAM is running at the correct speed using CPU-Z or Task Manager’s performance tab.
Optimizing Performance
BIOS Settings
Access your BIOS by pressing Delete, F2, or F12 during system startup (specific key varies by manufacturer). Enable XMP/EXPO memory profiles first, as this provides the most significant performance improvement. Set your boot drive priority to your NVMe SSD to ensure fast startup times.
Disable unnecessary RGB lighting and audio features if you’re not using them to reduce minor power draw and potential compatibility issues. Enable Resizable BAR (ReBAR) support if your CPU and GPU support it—this feature allows the CPU to access the full GPU memory space, providing 5-10% performance gains in supported titles.
Fan curve configuration helps balance noise and cooling—set CPU and case fans to ramp up gradually between 40-75°C. Aggressive fan curves create noise without meaningful temperature improvements until components reach higher thermal loads. Save your BIOS profile before exiting to preserve your optimizations.
In-Game Settings Optimization
Start with the game’s built-in preset system—High settings typically offer the best balance between visual quality and performance at 1080p. Ultra settings often demand significantly more GPU power for minimal visual improvements that are barely noticeable during active gameplay.
**Resolution scaling and temporal upscaling technologies** provide free performance boosts in 2026. AMD FSR 3, NVIDIA DLSS 3.5, and Intel XeSS allow rendering at lower internal resolutions while maintaining image quality through AI reconstruction. These technologies can boost framerates by 30-60% with minimal visual degradation.
Disable or reduce demanding settings that have little visual impact during gameplay. Motion blur, chromatic aberration, and film grain reduce clarity and consume GPU resources. Volumetric fog and god rays look impressive in screenshots but significantly impact performance—medium settings often look nearly identical to ultra during active play.
Monitoring and Maintaining Performance
Use MSI Afterburner with RivaTuner Statistics Server to display real-time FPS, GPU/CPU temperatures, and utilization percentages. This overlay helps identify bottlenecks—if your GPU isn’t reaching 95-100% utilization, your CPU or RAM may be limiting performance. Target GPU temperatures under 80°C and CPU temperatures under 85°C during gaming loads.
Clean your PC every 3-4 months by removing dust buildup from fans, heatsinks, and intake filters using compressed air. Dust accumulation reduces cooling efficiency, leading to thermal throttling and reduced performance over time. Brief cleaning sessions maintain optimal airflow and component longevity.
Monitor your storage space—maintaining at least 10-15% free space on your SSD prevents performance degradation. Modern SSDs slow down significantly when completely filled, as they need empty blocks for wear leveling and garbage collection operations. Move older games to secondary storage or uninstall titles you’re not actively playing.
Common Issues and Solutions
Boot and POST Problems
If your PC won’t boot or display video output, first verify all power connections are firmly seated. The 24-pin motherboard and 8-pin CPU power connectors require significant force to fully seat. Reseat your RAM modules—memory is the most common cause of no-POST situations, with improper seating accounting for over 40% of new build boot failures.
Check that your display cable connects to the GPU’s video outputs rather than the motherboard’s ports. This mistake is extremely common and results in a black screen even when the system is running perfectly. Ensure your monitor selects the correct input source—many monitors default to HDMI when you might be using DisplayPort.
Clear CMOS by removing the motherboard battery for 30 seconds or using the clear CMOS jumper if BIOS settings prevent booting. This resets all BIOS settings to defaults, which can resolve boot issues caused by incompatible overclocks or incorrect configuration. Consult your motherboard manual for the exact CMOS reset procedure.
Thermal Management Issues
High temperatures during gaming indicate inadequate cooling or improper component installation. Verify your CPU cooler is mounted with proper tension—loose mounting pressure reduces thermal transfer efficiency. Check that you removed the protective plastic film from the cooler’s base plate, a surprisingly common oversight that causes immediate overheating.
GPU thermal throttling often stems from aggressive fan curves set too conservatively or blocked airflow from poor case ventilation. Ensure at least one intake fan and one exhaust fan are installed, creating positive or neutral air pressure. GPU temperatures in the 75-85°C range during gaming are normal and safe, despite seeming high.
Repaste your CPU cooler if you need to remount it after initial installation—the original thermal paste becomes ineffective once disturbed. Use a small pea-sized amount of quality thermal paste, as too much paste actually insulates rather than conducts heat. Thermal paste performance differences between budget and premium options are typically 1-3°C.
Performance Issues
**Stuttering and frame drops** during gameplay suggest several potential issues. Update GPU drivers to the latest version—driver updates often include game-specific optimizations that resolve stuttering. Close background applications consuming CPU resources, particularly Chrome with many tabs open or streaming software you’re not actively using.
Low FPS despite appropriate hardware indicates potential CPU or RAM limitations. Verify RAM is running at XMP speeds rather than default 2133MHz—this alone can account for 20-30 FPS differences in CPU-limited scenarios. Check Task Manager during gaming to identify whether CPU or GPU usage is maxing out—the bottleneck component needs attention.
Inconsistent frame times create perceived stuttering even with high average FPS. Enable V-Sync or use Adaptive Sync (FreeSync/G-Sync) if your monitor supports it to eliminate screen tearing and smooth frame delivery. Cap your framerate to your monitor’s refresh rate plus 3 FPS to reduce GPU power consumption and heat while maintaining smooth gameplay.
Driver and Software Conflicts
Use Display Driver Uninstaller (DDU) in Safe Mode when switching between GPU manufacturers or experiencing persistent driver issues. DDU removes all traces of previous GPU drivers, preventing conflicts that cause crashes, black screens, or performance problems. Always download the latest drivers directly from NVIDIA or AMD rather than relying on Windows Update versions.
Disable Windows Game Mode if you experience stuttering or performance inconsistencies. While intended to optimize gaming performance, Game Mode can interfere with hardware monitoring software and cause resource allocation issues on budget systems. Test both with Game Mode enabled and disabled to determine which works better for your specific configuration.
Keep Windows 11 updated with the latest patches—Microsoft regularly releases gaming performance improvements and scheduler optimizations. However, avoid preview or beta updates on your gaming PC, as these can introduce instability. Stick with stable release channel updates for the best balance of features and reliability.
Long-Term Considerations
Upgrade Path Planning
Design your budget build with future upgrades in mind—selecting a motherboard with strong VRMs and BIOS support for future CPU generations extends your platform’s lifespan. AMD’s AM4 and AM5 platforms offer exc nt upgrade paths, while Intel’s platforms typically support two generations. A budget B650 board today can support high-end Ryzen 8000 CPUs tomorrow.
Your GPU represents the easiest and most impactful upgrade in 2-3 years. Budget builds should prioritize a quality CPU and sufficient RAM initially, as these components age more gracefully. Graphics cards see the most significant generational improvements, making them ideal candidates for mid-cycle upgrades when you want better visual fidelity or higher framerates.
Power supply headroom enables future GPU upgrades without replacing the PSU. A 650W unit provides enough power for most single-GPU configurations, including potential upgrades to higher-tier cards. Quality PSUs last 7-10 years across multiple builds, making them worth the initial investment in reliability and warranty coverage.
Value Retention
Computer components depreciate rapidly, with GPUs losing 30-40% of their value in the first year. Budget wisely by purchasing components you’ll use for 3-4 years rather than chasing the latest releases. The performance improvements between generations have slowed, making even 2-3 year old hardware viable for 1080p gaming.
Maintain your system’s resale value by keeping original packaging, especially for the GPU and CPU. Well-documented, clean builds with receipts command higher prices in used markets. Consider that selling your GPU in 2-3 years can offset 40-60% of the cost of upgrading to a newer model.
Monitor manufacturer warranty coverage and register products when required. Most GPUs include 2-3 year warranties, while PSUs often feature 5-10 year coverage. Transferable warranties add value to used component sales and provide peace of mind for buyers, making your components more attractive in secondary markets.
Balancing Current Needs and Future Value
Avoid over-investing in components that exceed 1080p gaming requirements—a $700 GPU in a budget build is misallocated spending. That money is better distributed across a balanced system or saved for future upgrades when you move to 1440p gaming. Budget builds should target 60+ FPS at high settings, not 200+ FPS that your 60Hz or 144Hz monitor can’t display.
Consider the total cost of ownership when selecting components. A $120 motherboard with robust VRMs and feature set may cost $30 more than a bare-bones option but enables CPU upgrades and better overclocking support. This $30 investment can delay a complete platform replacement by 1-2 years, saving hundreds in the long term.
Reinvest savings from smart budget decisions into peripherals or your monitor. A quality 1080p 144Hz monitor with FreeSync/G-Sync dramatically improves gaming experience compared to a 60Hz display. Comfortable keyboard and mouse reduce fatigue during long gaming sessions and last across multiple PC builds, making them worthwhile investments.
Conclusion
Building a budget gaming PC for 1080p in 2026 delivers exceptional value and performance when you make informed component choices. By targeting the $600-$900 price range, you can achieve smooth high-settings gameplay in modern titles while maintaining room for future upgrades. Focus on balanced component selection rather than overspending on any single part.
The key to successful budget building lies in understanding where to invest and where to save. A strong mid-range CPU and GPU combination, backed by adequate RAM and fast storage, provides years of reliable 1080p gaming performance. Don’t overlook the importance of quality power supplies and cooling solutions that protect your investment and ensure stable operation.
Start your budget gaming PC build with confidence, knowing that careful planning and smart shopping can deliver a system that punches well above its price point. The 1080p gaming experience in 2026 is better than ever, with incredible value available across all component categories for builders willing to research and compare options.
Frequently Asked Questions
Q: What is the ideal budget for a 1080p gaming PC build in 2026?
A: The sweet spot for a complete 1080p gaming PC in 2026 sits between $700-$900, excluding peripherals and monitor. This budget delivers 60+ FPS at high settings in modern AAA titles and exc nt performance in esports games. You can build a functional 1080p system for $600, but the extra $100-$200 provides meaningful performance improvements and better future-proofing.
Q: How can I ensure the best possible performance from my budget gaming PC?
A: Enable XMP/EXPO memory profiles in BIOS, keep GPU drivers updated, and optimize in-game settings by disabling high-cost, low-impact features like motion blur and excessive shadow quality. Use upscaling technologies like FSR or DLSS to boost framerates while maintaining visual quality. Regular maintenance including dust cleaning and storage management keeps your system running at peak performance.
Q: What are some common mistakes to avoid when building a budget gaming PC?
A: Don’t cheap out on the power supply—a failing PSU can destroy your entire system. Avoid overspending on unnecessary RGB features or premium aesthetics at the expense of core performance components. Don’t pair a high-end GPU with a weak CPU or vice versa, as this creates bottlenecks. Never skip enabling XMP for your RAM or updating GPU drivers after building your system.
Q: Should I buy used components for my budget gaming build?
A: Used CPUs, motherboards, and RAM are generally safe purchases with minimal risk, as these components rarely fail. Exercise extreme caution with used GPUs, avoiding cards that may have been heavily used for cryptocurrency mining. Always buy new power supplies to ensure warranty coverage and reliability. Used NVMe SSDs can be risky due to hidden wear levels, though SATA SSDs are relatively safe if you can verify their health status.
Top Product Recommendations
| Product Name | Rating | Key Feature | Est. Price | Action |
|---|---|---|---|---|
| Top-rated AMD Ryzen 5 7600 processor | ★★★★★ | Editor-recommended AMD Ryzen 5 7600 processor from this guide | $18–$42 | Check Lowest Price on Amazon |
| Best-value NVIDIA RTX 4060 graphics card | ★★★★☆ | Affordable NVIDIA RTX 4060 graphics card — strong everyday results | $12–$28 | Check Lowest Price on Amazon |
| Premium 16GB DDR4 RAM 3200MHz | ★★★★☆ | Higher-end 16GB DDR4 RAM 3200MHz for visible, lasting results | $45–$95 | Check Lowest Price on Amazon |
Affiliate Disclosure: This post contains affiliate links. We may earn a commission if you buy through our links, at no extra cost to you.
Leave a Reply