Building a budget gaming PC is one of the smartest moves any gamer can make in 2026. Whether you are upgrading from an older system or starting from scratch, a well-planned 1080p gaming rig delivers exc nt performance without draining your bank account. This guide walks you through every component, assembly step, and optimization tip you need to build a reliable budget gaming PC that handles modern titles at 1080p with smooth frame rates and crisp visuals.
A **budget gaming PC build guide 1080p 2026** setup typically targets 60 fps or higher in competitive games and a stable 30–60 fps in graphically demanding AAA releases. The sweet spot for a 1080p gaming build in 2026 sits around $600–$900, depending on component sales and availability. This price range gets you a modern CPU, a capable mid-range GPU, 16 GB of RAM, and a fast SSD — everything needed for an enjoyable 1080p gaming experience.
This guide is written for first-time builders and experienced enthusiasts alike. If you want to save money compared to buying a pre-built system and gain the satisfaction of building your own machine, you are in the right place. Every section below covers real components available on the US market, practical assembly tips, and settings that maximize your gaming performance right out of the box.
Key Components for a Budget 1080p Gaming PC
The processor is the heart of your gaming PC build, and for 1080p gaming in 2026, you have two standout choices in the budget-to-mid range. The **AMD Ryzen 5 5600X** remains an exceptional value, offering six cores and twelve threads that handle gaming and multitasking without bottlenecking your GPU. On the Intel side, the **Core i5-12400F** delivers strong single-threaded performance that games love, and it comes at a competitive price point that makes it ideal for budget builds.
The graphics card determines your gaming experience more than any other single component. For 1080p gaming, the **NVIDIA GeForce RTX 3060** and the **AMD Radeon RX 6600** are the two cards most builders target in 2026. Both deliver smooth 60 fps gameplay in popular titles at high settings and support modern features like ray tracing and upscaling technologies.
- **RTX 3060**: Strong driver support, DLSS upscaling, ray tracing capability
- **RX 6600**: Exc nt price-to-performance, efficient power draw, FSR support
- Both cards fit comfortably in a budget build with a 550W PSU
RAM and storage round out your core specifications. Aim for **16 GB of DDR4-3200** memory in a dual-channel configuration (two 8 GB sticks). For storage, a **1 TB NVMe SSD** is the minimum you should consider — boot times drop dramatically, and game loading screens become nearly instant compared to older SATA drives.
Your power supply needs to be reliable and adequately rated. A **550–600 watt 80+ Bronze certified PSU** from a reputable brand like Corsair, EVGA, or Seasonic powers this build with headroom for future upgrades. Never cheap out on the PSU — it protects every other component in your system.
Quick pick: Compare top-rated Pc options.
Assembling the Budget 1080p Gaming PC
Before you touch any components, prepare your workspace on a flat, non-conductive surface. Gather a Phillips-head screwdriver, an anti-static wrist strap (optional but recommended), and your component box. Having good lighting and a clear workspace prevents mistakes that could damage expensive parts.
Start by installing the processor into the motherboard. Open the CPU socket lever, align the triangle on the processor corner with the triangle on the socket, and gently place the chip in — never force it. Lower the lever to secure the CPU. Next, apply a pea-sized amount of thermal paste to the processor surface and install your CPU cooler according to the cooler’s instructions.
Install your RAM sticks by pressing them firmly into the DDR4 slots until the side clips click. For most motherboards, slots two and four from the CPU (the second and fourth slots) are the preferred dual-channel configuration — consult your motherboard manual to confirm. Mount the NVMe SSD into the M.2 slot and secure it with the small screw provided with your motherboard.
Now install the motherboard into your case by aligning the standoff screws and securing it with the provided screws. Connect the front panel connectors (power button, reset button, USB ports, and audio jacks) using the case and motherboard manuals as guides. Finally, install the GPU by seating it firmly into the primary PCIe x16 slot and securing it with case screws.
Connect your PSU to the motherboard 24-pin ATX connector, the 8-pin CPU power connector, and the GPU power connectors. Cable management matters for airflow — route cables behind the motherboard tray where your case supports it. Double-check every connection before you power on.
Essential Accessories and Peripherals
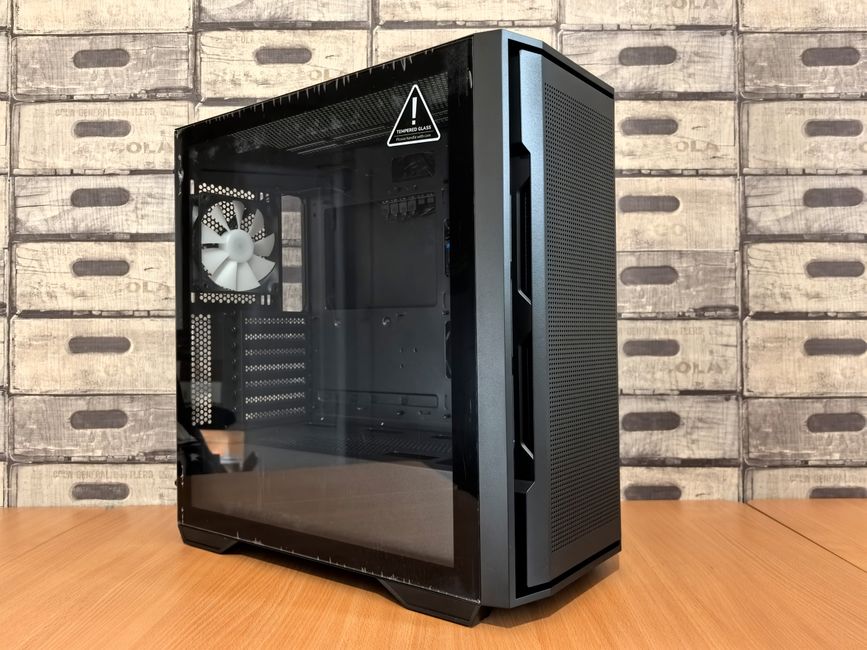
A great gaming PC needs the right peripherals to deliver a complete experience. Your case choice affects airflow, temperatures, and noise levels. Look for a mid-tower case with at least two front intake fans and solid dust filtration. Cases from brands like Fractal Design, NZXT, and Corsair offer good airflow and easy assembly features at reasonable prices.
For 1080p gaming, you want a monitor that matches your GPU’s output capabilities. A **24-inch 1080p 144Hz IPS monitor** strikes the ideal balance between price and performance. The higher refresh rate makes fast-paced games feel dramatically smoother, and IPS panels deliver accurate colors and wide viewing angles.
| Peripheral | Recommended Spec | Why It Matters |
|---|---|---|
| Monitor | 24-inch, 1080p, 144Hz, IPS | Smooth gameplay, accurate colors |
| Keyboard | Mechanical, cherry MX or equivalent | Faster response, tactile feedback |
| Mouse | Gaming mouse, 800–3200 DPI | Precision aiming, ergonomic comfort |
| Headset | Closed-back, stereo or 7.1 | Immersive audio, clear chat |
For keyboards, a **mechanical gaming keyboard** with linear or tactile switches improves your reaction time during competitive play. Paired with a high-DPI gaming mouse and a quality headset, your setup feels every bit as premium as systems costing twice as much.
Optimizing Your Gaming PC for the Best Performance
Once your system is assembled, take time to configure BIOS and software settings for peak performance. Enter your BIOS by pressing the designated key (usually Delete or F2) during boot. Enable **XMP/DOCP** to run your RAM at its rated speed — this alone can boost gaming performance by 5–10%. Make sure your CPU cooler profile is set to PWM mode so fans respond dynamically to temperature.
Install the latest drivers for your GPU directly from NVIDIA or AMD — do not rely on Windows automatic driver detection. Download **GeForce Experience** for NVIDIA cards or **Radeon Software** for AMD cards to manage driver updates and optimize game settings automatically. Keeping your chipset and network drivers updated also reduces stuttering and improves system stability.
Overclocking is optional but can squeeze extra performance from your hardware. For beginners, GPU overclocking is safer than CPU overclocking. Use tools like **MSI Afterburner** to raise the core clock speed by 50–100 MHz increments and monitor temperatures closely. Never exceed 85°C on your GPU under load, and always run a stress test or play for 30 minutes before declaring stability.
Regular maintenance keeps your gaming PC running fast. Clean dust from fans and filters every three to six months, update your drivers monthly, and run a malware scan weekly. These habits extend component lifespan and maintain consistent frame rates over years of use.
Common Problems and Fixes for 1080p Gaming PCs
Even well-planned builds encounter issues. One of the most common problems new builders face is **no display output after initial assembly**. If your monitor shows no signal, reseat your RAM sticks, verify the GPU is fully inserted, and confirm the monitor cable connects to the graphics card and not just the motherboard video output.
Overheating causes sudden crashes, frame drops, and throttling during extended gaming sessions. Check that all case fans are oriented correctly — front fans should pull air in, rear and top fans should exhaust air out. Reapply thermal paste if your CPU temperatures exceed 90°C under load, and consider upgrading your CPU cooler if you plan to overclock.
Driver conflicts create weird glitches like screen tearing, flickering, or random freezes. Uninstall old GPU drivers completely using **Display Driver Uninstaller (DDU)** before installing new ones. Run Windows Update after driver installation to ensure your operating system and chipset drivers are current.
Upgrading and Future-Proofing Your Gaming PC
Building a budget gaming PC does not mean locking yourself into outdated hardware. Choose a motherboard with extra RAM slots and an M.2 slot so you can add storage and memory later. A B550 or B660 chipset motherboard gives you upgrade paths to faster Ryzen or Intel processors without replacing the entire board.
When selecting a GPU, pick a model with a **dual-fan cooler and a factory overclock** — these cards typically have better thermal headroom for future driver optimizations. Your PSU should have extra wattage capacity beyond your current system’s needs so you can drop in a more powerful GPU later without buying a new power supply.
Stay informed about new GPU generations, CPU releases, and memory standards by following trusted gaming tech sites and forums. DDR5 memory is becoming more mainstream, so if you build today on a platform that supports it, your upgrade path is smoother. Budget gaming builds in 2026 benefit from the massive improvements in CPU efficiency seen in recent generations — your build will remain relevant for several years with modest upgrades.
Frequently Asked Questions (FAQ)
What is the ideal budget for a 1080p gaming PC build in 2026?
Most builders targeting 1080p gaming in 2026 spend between **$600 and $900** for a complete system. This range covers a modern six-core CPU, a capable mid-range GPU like the RTX 3060 or RX 6600, 16 GB of RAM, and a 1 TB NVMe SSD. You can go lower by buying used components or waiting for sales, but $600–$900 is the sweet spot for new parts with a three to four year upgrade cycle.
How important is it to future-proof my gaming PC build?
Future-proofing matters more than most builders realize. Spending an extra $30–$50 on a **B550 or B660 motherboard** instead of an A-series board gives you CPU upgrade options down the road. Likewise, a 600W PSU instead of a 450W unit lets you install a stronger GPU later without replacing the power supply. Small smart choices during the initial build save hundreds of dollars when you decide to upgrade in two or three years.
Can I use my current peripherals with a new gaming PC build, or should I upgrade them too?
Most peripherals from an older PC work seamlessly with a new build. Standard USB keyboards, mice, headsets, and monitors connect without any compatibility issues. The only exception is if your current monitor maxes out at 60Hz and you want the smoother experience of a 144Hz display. In most cases, start with your existing peripherals and upgrade your monitor or keyboard as your budget allows — these upgrades make the most noticeable difference in daily gaming enjoyment.
Top Product Recommendations
| Product Name | Rating | Key Feature | Est. Price | Action |
|---|---|---|---|---|
| Top-rated budget gaming PC build 1080p | ★★★★★ | Editor-recommended budget gaming PC build 1080p from this guide | $18–$42 | Check Lowest Price on Amazon |
| Best-value AMD Ryzen 5 5600X processor | ★★★★☆ | Affordable AMD Ryzen 5 5600X processor — strong everyday results | $12–$28 | Check Lowest Price on Amazon |
| Premium 144Hz gaming monitor 1080p IPS | ★★★★☆ | Higher-end 144Hz gaming monitor 1080p IPS for visible, lasting results | $45–$95 | Check Lowest Price on Amazon |
Affiliate Disclosure: This post contains affiliate links. We may earn a commission if you buy through our links, at no extra cost to you.
Leave a Reply